Example of applying REVIVE to Lander Hover
Description
The Lander Hover environment is the transformation of the Lunar Lander environment in Gym. The goal of the mission is changed from landing to hovering over the lunar surface. This environment is part of the Box2D environments. One could refer to that page for general information at first.
Action Space |
Discrete(4) |
Observation |
Shape (4,) |
Observation |
High [1.5 1.5 5. 5. ] |
Observation |
Low [-1.5 -1.5 -5. -5. ] |
This environment is a classic rocket trajectory optimization problem. According to Pontryagin’s maximum principle, it is optimal to fire the engine at full throttle or turn it off. According to it, actions are discrete: engine on or off.
The action space of this environment is discrete. The hovering target point is always at the coordinate, where \(x\)-axis and \(y\)-axis is with (0,1). The coordinates are also the first two dimensions of the state vector. By the way, the fuel of the lander is infinite.
Action Space
There are four discrete actions available: doing nothing, firing the left orientation engine, firing the main engine, and firing the right orientation engine.
Observation Space
The state is a 4-dimensional vector: the coordinates of the lander in \(x\)-axis & \(y\)-axis, its linear velocities in \(x\)-axis & \(y\)-axis.
Rewards
The hovering target point is at (0,1). If the deviation of both the x and y coordinates of the lander is less than 0.2. then the lander hovering is considered successful. Get a bonus of 10 scores, otherwise get a -0.3 penalty.
if abs(state[0]) <= 0.2 and abs(state[1]-1) <= 0.2:
   reward = 10
else:
   reward = -0.3
Starting State
The lander starts at the top center of the viewport with a random initial force applied to its center of mass. A random initial force will give the lander an initial velocity in both the \(x\) and \(y\) directions.
Episode Termination
The episode finishes if:
The lander crashes (the lander’s body gets in contact with the moon’s surface);
The lander gets outside of the viewport (with coordinate \(x\)-axis greater than 1);
Time step to reach 400 steps;
The lander is not awake. From the Box2D, a body which is not awake is a body not moving and not colliding with any other body: When Box2D determines that a body (or group of bodies) has/have come to rest, the body enters a sleep state which has very little CPU overhead. If a body is awake and collides with a sleeping body, then the sleeping body wakes up. Bodies will also wake up if a joint or contact attached to them is destroyed.
Train Control Policy Using REVIVE SDK
The REVIVE SDK is a historical data-driven tool. According to the description in the documentation, the use of the REVIVE SDK for hovering tasks can be divided into the following steps:
Collect historical decision-making data for hovering tasks;
Combine business scenarios and collected historical data to build decision flow graph and array data, which mainly describe the interaction logic of business data. The decision flowchart is stored using
.yamlfiles, and the array data storing node data defined in the decision flowchart is stored using.npzor.h5files.With the above decision flow graph and array data, the REVIVE SDK can already conduct virtual environment model training. However, in order to obtain a better control strategy, it is necessary to define a reward function according to the task goal. The reward function defines the optimization goal of the strategy and can guide the control strategy to hover the lander better at the target position.
After defining the decision flow graph, training data, and reward function, we can use the REVIVE SDK to start virtual environment model training and policy model training.
Finally, the policy model trained by the REVIVE SDK needs to be tested online.
Collect historical data
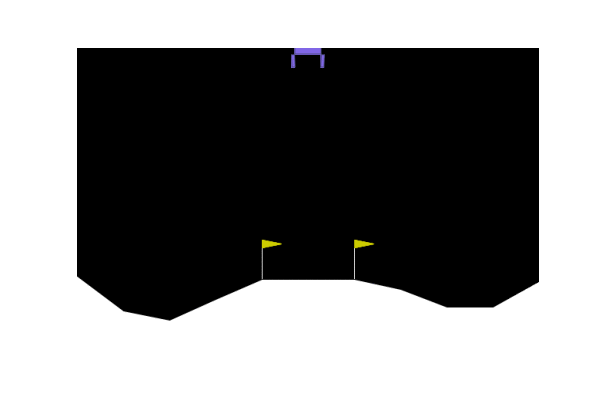
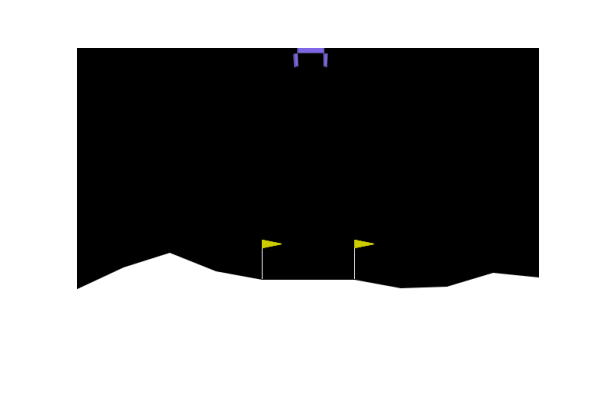
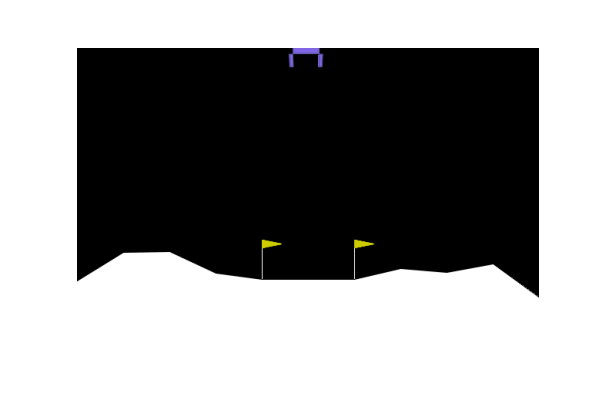
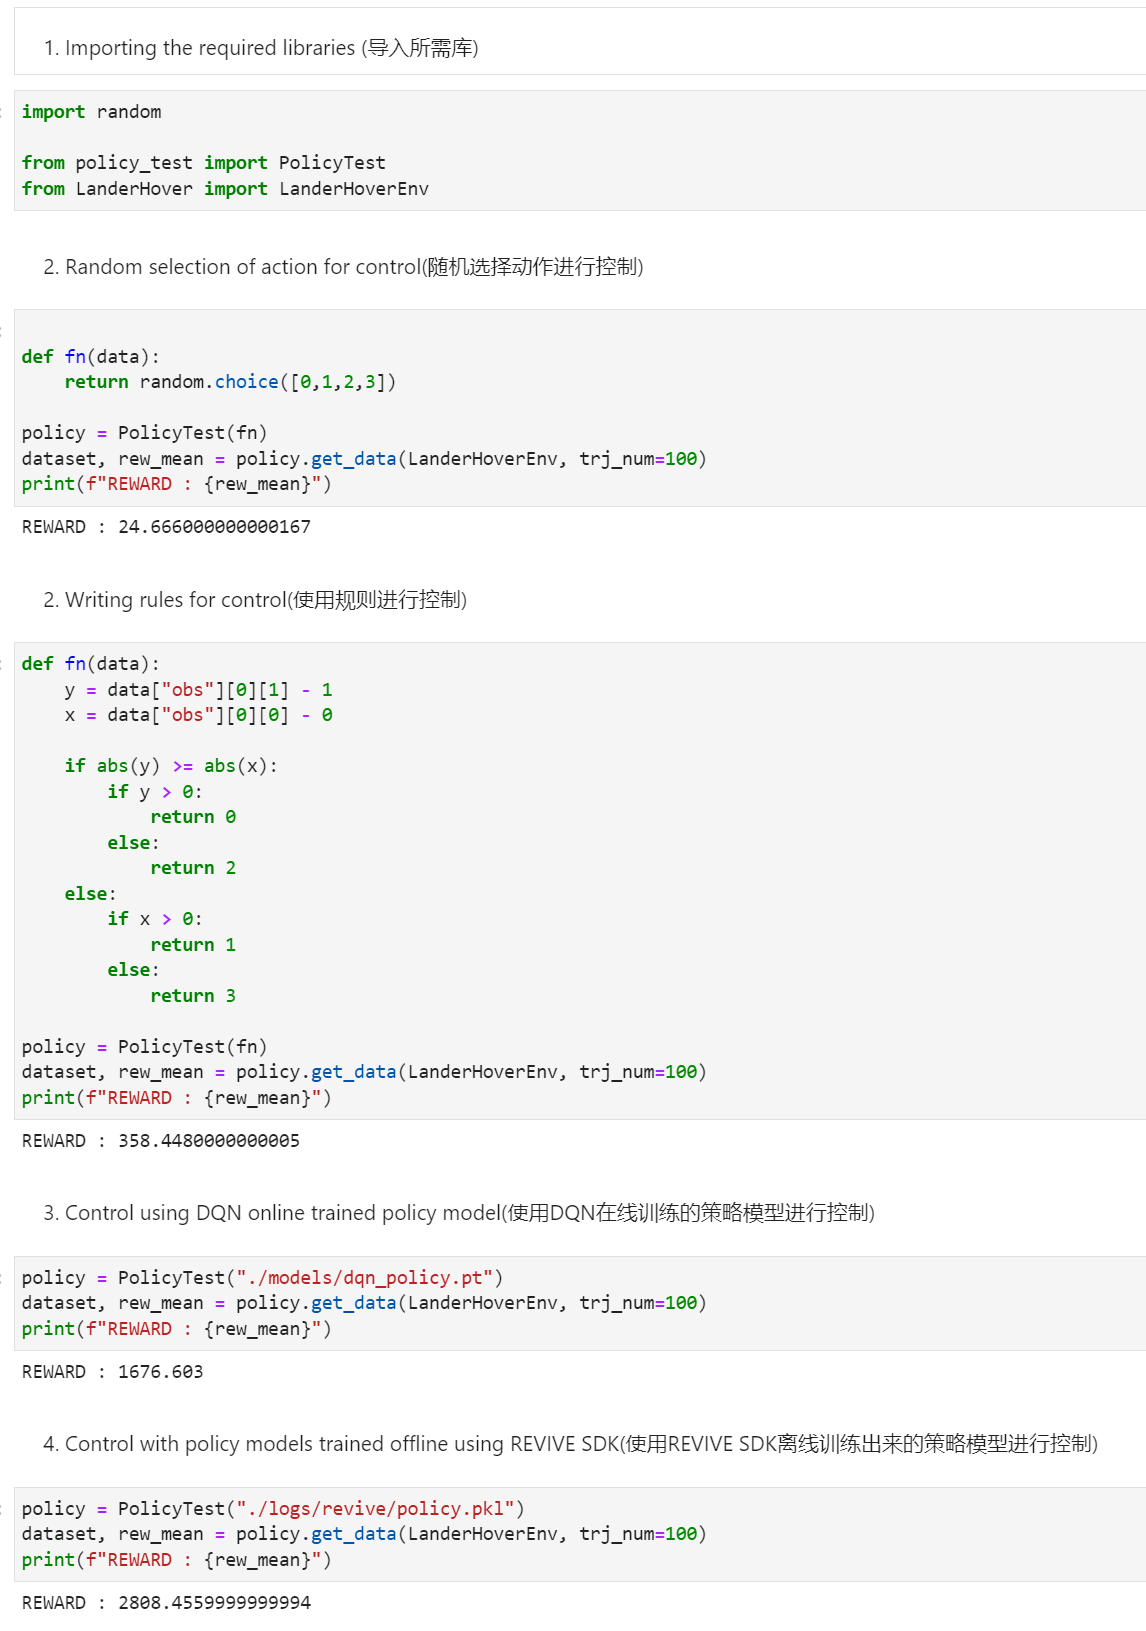
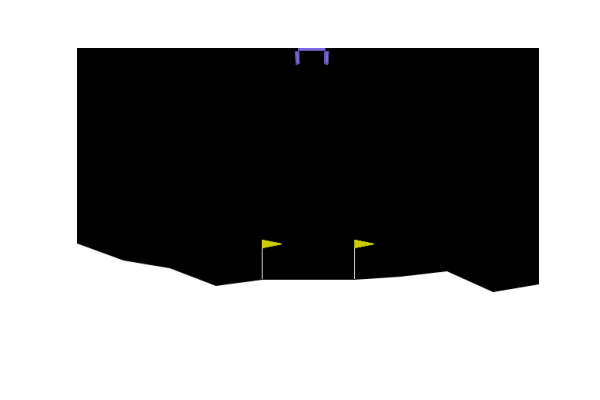
We use a coordinate-based control strategy to simulate historical decision-making processes and collect data. Specifically, the coordinate-based control strategy provides corresponding actions based on how far the current lander’s position deviates from the target position, in order to control the lander to get as close as possible to the target position. The control effect is shown in the figure below:
Define decision flow and prepare data
After completing the collection of historical data, we need to construct a decision flow graph and array data based on the business scenario. The decision flowchart accurately defines the causal relationship between the data.In the hover landing task, we can observe the relevant state information of the lander. The state is a four-dimensional vector, including the lander’s \(X\) axis coordinates, the lander’s \(Y\) axis coordinates, the lander’s \(X\) axis velocity, and the lander’s \(Y\) axis velocity. The action space consists of four independent actions: do nothing, start left engine, start main engine, and start right engine.
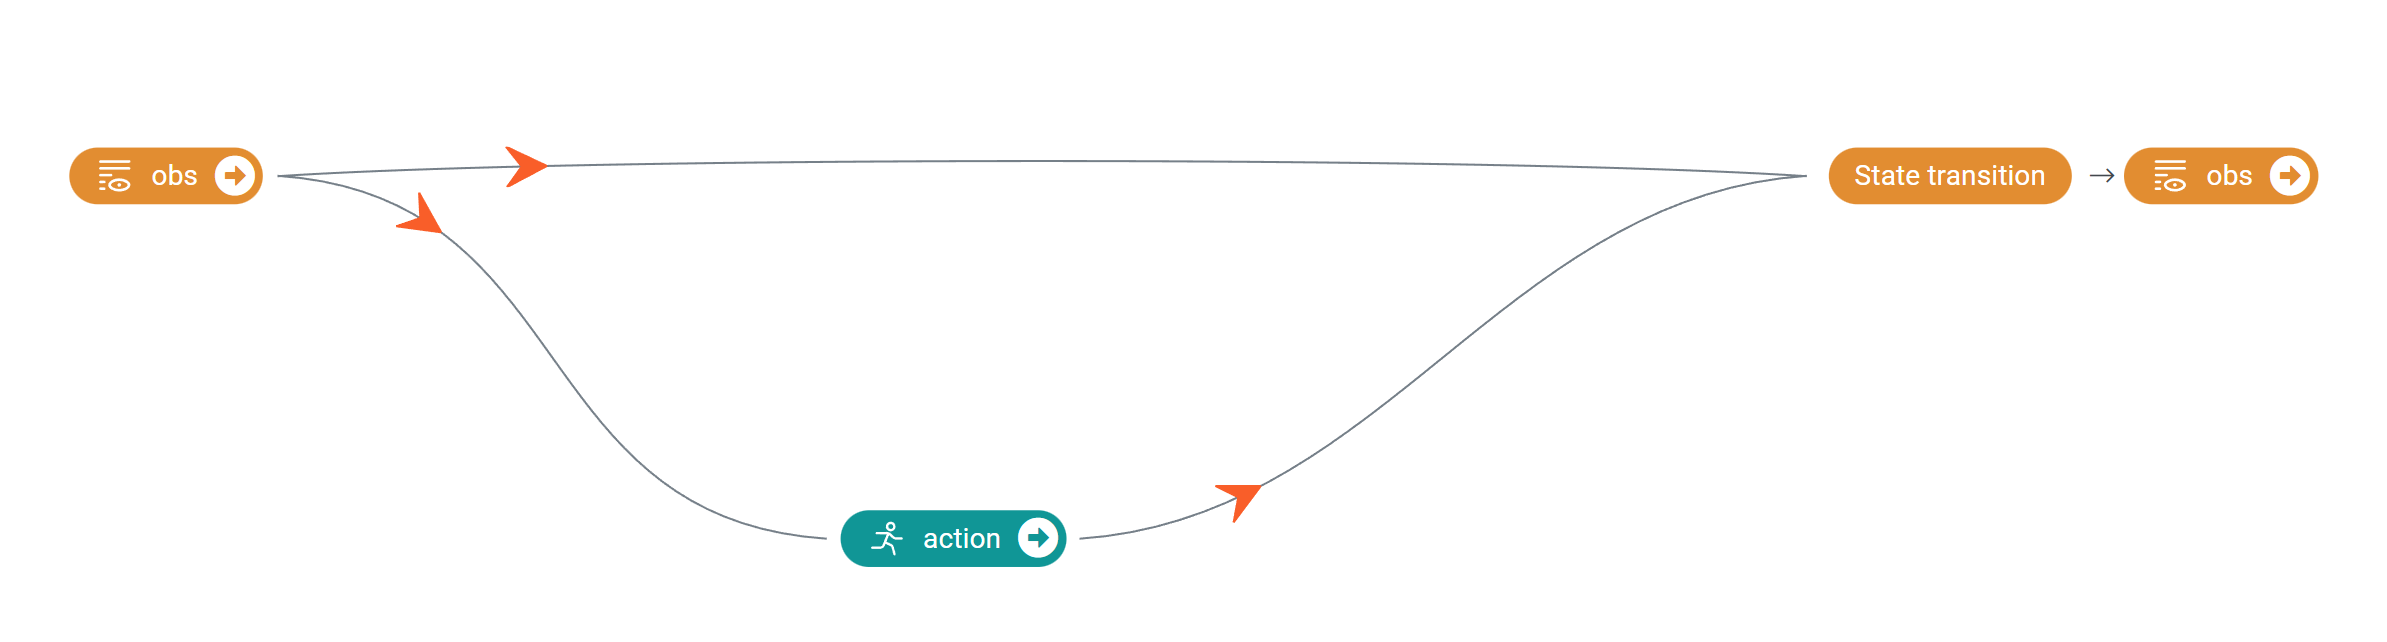
Based on our understanding of the business, we have constructed the following decision flow graph, which includes three nodes.
The obs node represents the state of the lander, the action node represents the lander’s action, and the next_obs node
represents the state of the lander at the next moment. The edge from the obs node to the action node indicates that the
lander’s action should be determined solely by its state, while the edges from the obs node and action node to the next_obs node
indicate that the state of the lander at the next moment is jointly affected by its current state and control action.
The corresponding .yaml file for the above decision flowchart is as follows:
metadata:
   columns:
     - obs_0:
         dim: obs
         type: continuous
     - obs_1:
         dim: obs
         type: continuous
     - obs_2:
         dim: obs
         type: continuous
     - obs_3:
         dim: obs
         type: continuous
     - action:
         dim: action
         type: category
         values: [0,1,2,3]

   graph:
     action:
     - obs
     next_obs:
     - obs
     - action
In the process of preparing the decision flowchart, we also convert the raw data into a .npz file for storage.
For more detailed descriptions of decision flowcharts and data preparation, please refer to the documentation in the data preparation section of the tutorial.
Write the Reward Function
The design of the reward function is crucial for learning strategies. A good reward function should be able to guide the policy towards the expected direction of learning. The REVIVE SDK supports defining reward functions in the form of Python source files.
The target point for the hover task is located at (0,1). If the deviation of the lander’s \(x\) and \(y\) coordinates is less than 0.2, the landing hover is considered successful and receives a reward of 10 points; otherwise, it incurs a penalty of 0.3 points. The following code shows how to convert the task goal provided by the lander hovering environment into a reward function required by the REVIVE SDK.
import torch
from typing import Dict

def get_reward(data : Dict[str, torch.Tensor]):

   return torch.where((torch.abs(data["next_obs"][...,0:1]) < 0.2) \&
                      (torch.abs(data["next_obs"][...,1:2] - 1) < 0.2), 10,-0.3)
For more detailed descriptions of defining reward functions, please refer to the documentation in the reward function section of the tutorial.
Use REVIVE Train a Control Policy
The data and code for the Pendulum and refrigerator example have been provided. The code can be found and run at SDK source code repositories.
After completing the installation of the REVIVE SDK, you can switch to the directory examples/task/LanderHover and run
the following Bash command to start training the virtual environment model and policy model. During the training process,
we can use tensorboard to open the log directory to monitor the progress of the training. Once the REVIVE SDK completes the
training of the virtual environment model and policy model, we can find the saved models (.pkl or .onnx) in the log
folder ( logs/<run_id> ).
python train.py -df data/LanderHover.npz -cf data/LanderHover.yaml -rf data/LanderHover.py -rcf data/config.json -vm once -pm once --run_id revive --revive_epoch 1000 --ppo_epoch 500
Testing The Trained Policy Model on the Environment
Once the training is complete, a jupyter notebook is provided with an example to test the effect of the completed training strategy.
Showing the Control Effect of Different Policies
The following shows the effect of control using different policies.
Policy 1: Control by random selection of action
Policy 2: Control by specific rules according to coordinate information
Policy 3: Control by policy trained online using DQN
Policy 4: Control by policy trained offline using REVIVE SDK